Alta Via 2: Dolomites Hut-to-Hut Route, Stages and Planning
Alta Via 2 crosses the Dolomites in 13 hut stages from Bressanone to Feltre, with exposed ground, fixed cables and long days on high limestone terrain.
On this page
Alta Via 2 is the Dolomites' long, serious north-south traverse, running from Bressanone (Brixen) to Feltre across limestone plateaus, the Marmolada flank and steep southern gullies. It suits experienced alpine hikers who are comfortable on exposed ground with fixed cables and can handle consecutive six- to seven-hour days. If you want a hut-to-hut route with more escape options and a gentler gradient, Alta Via 1 is the better first choice. Hikers weighing up a softer hut-to-hut alternative can also look at hiking in Val Gardena as a base-village option.
What the Alta Via 2 is
The route runs north to south through the Dolomites in Italy, starting in Bressanone and finishing in Feltre. A mapped 13-day itinerary totals 169 km (105 miles) with about 11,000 m (36,000 ft) of ascent and a similar amount of descent, walked at three to seven hours per day. The shape is not a single ridge but a chain of linked massifs: the northern plateau around Plose and Puez, the Marmolada group in the middle, and the Pale di San Martino and southern grass slopes toward Feltre.
Self-guided operators divide the route in different ways, which is why you will see both a 12-day full version and a 6-day northern half. A self-guided company describes the full route as covering more than 19 mountain passes and reaching elevations close to 3,000 m (9,800 ft), with exposed sections, steep climbs and occasional fixed cables. That description matches the terrain split: the north is more open and rolling, while the south is steeper and more serious.
Who the route suits
This is not a first hut-to-hut route. The mapped stages are rated hard for most days, requiring very good fitness, sure-footedness and alpine experience, and the southern gullies in particular demand confidence on steep grass and rock. You should already be comfortable walking six to seven hours with a pack, moving on fixed cables without a guide, and reading weather that can turn a high pass into a snow or hail crossing.
Hikers who have done multi-day routes in the Alps but not in the Dolomites will find the via ferrata sections the main step up. The fixed cables are mostly short and used as protection rather than as a full climbing route, but a harness, helmet and via ferrata lanyard are part of the kit list. A self-guided package can handle hut bookings and GPS tracks, but it does not remove the need for mountain judgment on the exposed days.
Route shape and terrain
The northern Dolomites are limestone ridges rising out of rolling ski slopes, with high open plateaus and frequent huts. This is the more forgiving half: stages are shorter, the terrain is less vertical, and the huts give you more chances to shorten a day or wait out weather. The trade-off is that the northern plateau can feel exposed to wind and storms even when the valley is calm.
The southern Dolomites change character abruptly. The terrain becomes vertical, with steep grassy hillsides and gullies where a fixed cable is sometimes the only practical descent. That is where the route's reputation for exposure comes from, and where you want to be honest about your comfort level before committing to the full traverse.
Getting to the start and back from the finish
The route begins in Bressanone, a town with rail access in the Eisack valley, and the first stage climbs toward the Plose area above it. A mapped stage 1 route from Bressanone to Rif Bressanone (Plosehuette) covers 12.5 km (7.8 miles) with 1,860 m (6,100 ft) of ascent, so it is a full day on foot rather than a warm-up stroll. The Plose lift serves the area above Bressanone; hikers who use it should check the lift operator's published season and operating hours directly, since those change with the year.
At the southern end, the route finishes at Feltre after a long descent from Rif Dal Piaz. Feltre is a town in the foothills with bus and rail connections to the wider Veneto network, but the last stage is not a short walk out: the mapped stage 13 is 18.7 km (11.6 miles) with 1,830 m (6,000 ft) of descent. Plan your onward travel from Feltre for the following day rather than the same evening.
Distance, ascent and time, stage by stage
The stage figures below follow a mapped 13-day north-to-south itinerary. Distances and ascent are given in kilometres and metres, with walking times as mapped; your own times will depend on pack weight, weather and how much time you spend on the via ferrata sections.
Stage 1: Bressanone to Rif Bressanone (Plosehuette), 12.5 km (7.8 mi), 1,860 m (6,100 ft) ascent, about 5 h 57. Stage 2: Rif Bressanone to Rif Genova, 13.4 km (8.3 mi), 540 m (1,770 ft) ascent and 650 m (2,130 ft) descent, about 4 h 55. Stage 3: Rif Genova to Rif Puez, 11.5 km (7.1 mi), 700 m (2,300 ft) ascent and 550 m (1,800 ft) descent, about 5 h. Stage 4: Rif Puez to Rif Pisciadu, 9.7 km (6 mi), 650 m (2,130 ft) ascent and 560 m (1,840 ft) descent, about 4 h 35.
Stage 5: Rif Pisciadu to Rif Marmolada, 15.3 km (9.5 mi), 650 m (2,130 ft) ascent and 1,170 m (3,840 ft) descent, about 6 h 28. Stage 6: Rif Marmolada to Passo San Pellegrino, 20.2 km (12.6 mi), 1,050 m (3,440 ft) ascent and 1,200 m (3,940 ft) descent, about 7 h 13; this is the longest day on the mapped itinerary. Stage 7: Passo San Pellegrino to Rif Mulaz, 13.1 km (8.1 mi), 1,070 m (3,510 ft) ascent and 410 m (1,350 ft) descent, about 6 h 08. Stage 8: Rif Mulaz to Rif Rosetta, 6.9 km (4.3 mi), 640 m (2,100 ft) ascent and 640 m (2,100 ft) descent, about 3 h 52; this is the shortest and steepest short day.
Stage 9: Rif Rosetta to Rif Treviso, 12.5 km (7.8 mi), 790 m (2,590 ft) ascent and 1,700 m (5,580 ft) descent, about 6 h 55. Stage 10: Rif Treviso to Passo Cereda, 7.8 km (4.8 mi), 580 m (1,900 ft) ascent and 880 m (2,890 ft) descent, about 3 h 20; this stage is rated only moderate. Stage 11: Passo Cereda to Rif Boz, 13.3 km (8.3 mi), 1,470 m (4,820 ft) ascent and 1,140 m (3,740 ft) descent, about 7 h 10. Stage 12: Rif Boz to Rif Dal Piaz, 13.7 km (8.5 mi), 830 m (2,720 ft) ascent and 570 m (1,870 ft) descent, about 6 h 27. Stage 13: Rif Dal Piaz to Feltre, 18.7 km (11.6 mi), 170 m (560 ft) ascent and 1,830 m (6,000 ft) descent, about 6 h 19.
Northern stages: Bressanone to Rif Pisciadu
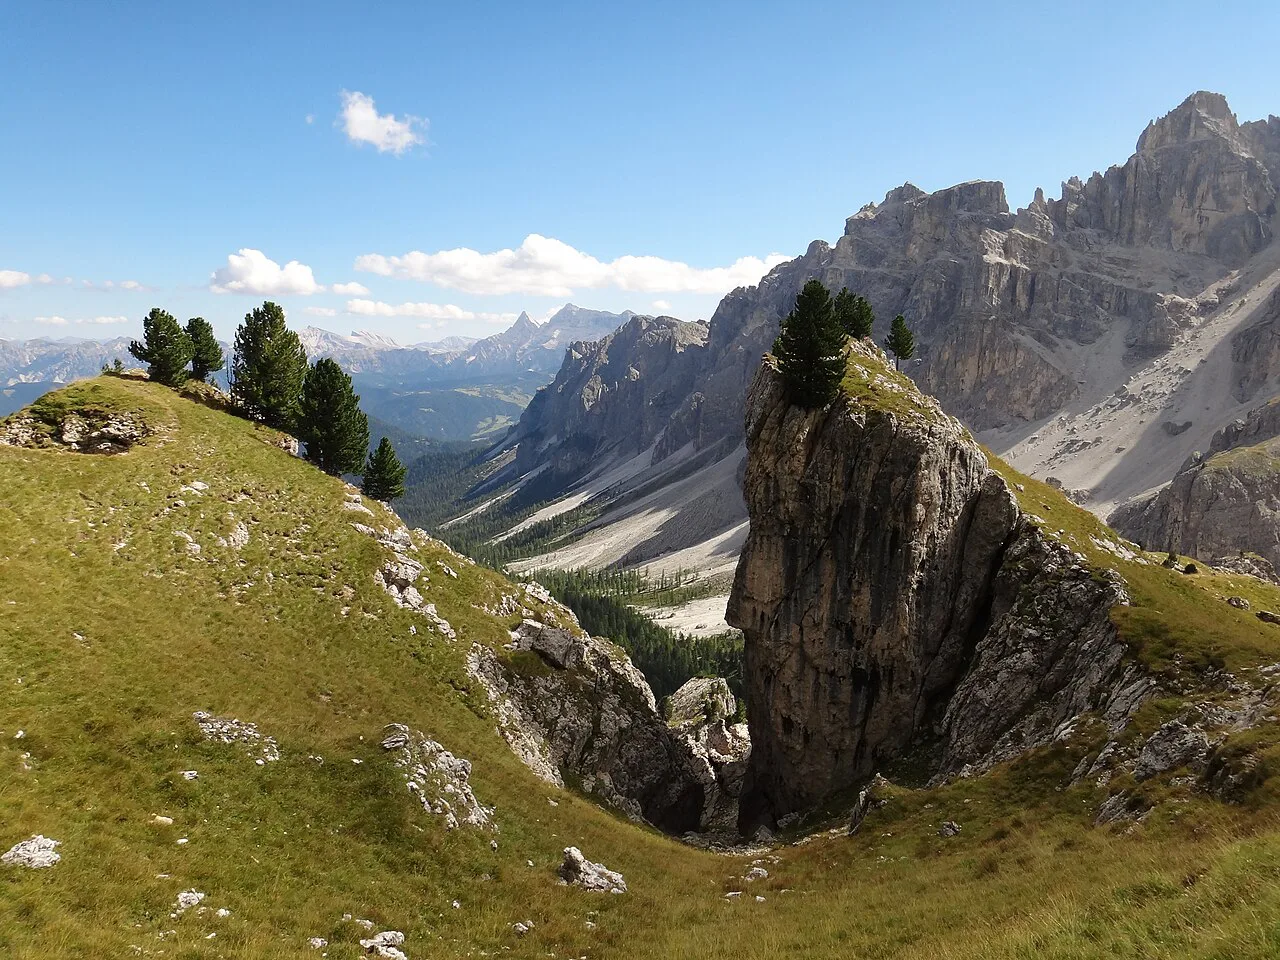
The first four days take you from the town of Bressanone up onto the Plose shoulder, then across to Rif Genova, Rif Puez and Rif Pisciadu. This is the section where the terrain is most open: limestone ridges, grassy plateaus and wide views back toward the Eisack valley. The stage figures stay moderate in distance, but the first day is the biggest single climb of the northern block at 1,860 m (6,100 ft).
The Puez area sits in the Puez-Odle Nature Park, where the landscape is more broken and the trails less direct than the plateau sections. You can also use the Adolf Munkel Trail as a day-hike alternative if you want a shorter taste of the same terrain without committing to the full traverse. For route choices on this part of the Dolomites, the hiking in dolomites guide gives a wider base for planning.
Marmolada stages and the long descent to Passo San Pellegrino
The Marmolada block is the middle crux of the route. Stage 5 from Rif Pisciadu to Rif Marmolada is a 15.3 km (9.5 mi) crossing with 1,170 m (3,840 ft) of descent, so you arrive at the hut with tired legs even though the ascent is modest. From there, the route makes a long traverse to Passo San Pellegrino, which is the longest stage on the mapped itinerary at 20.2 km (12.6 mi) and about seven hours of walking.
This is a good place to build in a rest day or to split the long stage if the weather is poor. The Passo San Pellegrino area has road access, which makes it one of the practical exit points if you need to leave the route or rejoin it later. Hikers wanting the harder Dolomites crossing but with more flexibility on this section should plan the Marmolada days first and fit the rest of the route around them.
Central stages: Passo San Pellegrino to Rif Treviso
From Passo San Pellegrino the route climbs to Rif Mulaz, then drops to Rif Rosetta before the long descent to Rif Treviso. Stage 7 is 13.1 km (8.1 mi) with 1,070 m (3,510 ft) of ascent and takes about six hours; stage 8 to Rif Rosetta is short in distance at 6.9 km (4.3 mi) but steep in both directions, with 640 m (2,100 ft) up and down. Stage 9 to Rif Treviso is a big descent day, with 1,700 m (5,580 ft) of downhill.
The terrain here is a transition: still high and rocky, but with more grass and more vertical relief than the northern plateau. This is where knee care starts to matter, because the descents outweigh the climbs on most days. Trekking poles and a habit of shortening your stride on steep grass will save you more than any fitness gain on the climbs.
Southern stages: Passo Cereda, Rif Boz, Rif Dal Piaz and Feltre
The southern half is where the route becomes a serious alpine test. Stage 11 from Passo Cereda to Rif Boz climbs 1,470 m (4,820 ft) over 13.3 km (8.3 mi), and stage 12 crosses to Rif Dal Piaz before the long descent to Feltre. This is steep grassy terrain with gullies and old military lines; the exposure is real, and a slip on wet grass can be more consequential than the technical difficulty suggests.
Some southern stages use bivouacs rather than staffed huts. Bivouacs are unmanned, so you need to carry food and a stove if you plan to sleep in one, and water usually comes from a nearby stream or spring. The mapped itinerary uses named huts on most nights, but reading the southern stage descriptions carefully will show you where a bivouac might replace a hut.
Short versions and mid-route exits
The 6-day northern section is the most realistic shorter option. A self-guided operator runs a north half with a maximum daily distance of 13 km (8.1 mi) and a maximum daily ascent of 1,100 m (3,600 ft), which keeps the days moderate and gives you the plateau scenery without the southern gullies. It is a good choice if you have a week rather than two and want hut-to-hut hiking dolomites without committing to the full traverse.
Road passes give you mid-route exits. Passo San Pellegrino, after the Marmolada stages, and Passo Cereda, in the southern section, both have road access and can be used to leave or rejoin the route. Plan these as your escape hatches if weather or injury forces a change, and check bus services from the pass with the local operator before you rely on them.
Huts on the route
The route uses a mix of alpine-club huts and private mountain huts, with the northern stages staying in staffed huts and the southern stages sometimes using bivouacs. Huts fill up quickly in the peak season, and many booking pages are in Italian or German. The mapped itinerary names the huts for each stage: Rif Bressanone, Rif Genova, Rif Puez, Rif Pisciadu, Rif Marmolada, Rif Mulaz, Rif Rosetta, Rif Treviso, Rif Boz and Rif Dal Piaz.
A self-guided package typically handles hut reservations and provides daily itineraries and GPS navigation. One Dolomites-based operator asks for a 30% deposit at booking confirmation and the balance eight weeks before the tour start, but those terms are specific to that company and should not be assumed for other operators or for independent bookings. If you book huts yourself, do it as soon as your dates are fixed and keep a paper list of confirmations.
Via ferrata sections and World War I remains
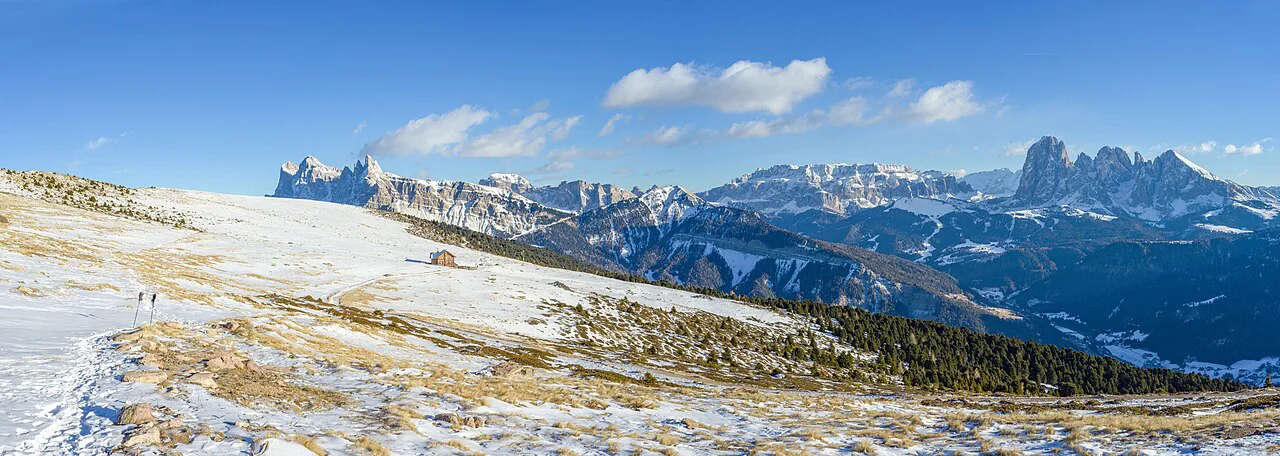
Several sections of the Alta Via 2 use fixed cables, ladders and old military paths from World War I. The via ferrata sections are mostly protected passages rather than full climbing routes, but they still require a harness, helmet and via ferrata lanyard, and the ability to clip and unclip efficiently on exposed ground. In the southern gullies, the fixed cable is sometimes the only practical way down.
The World War I remains are part of the route's character: tunnels, bunkers and gunnery positions cut into the rock around the Marmolada sector. Treat them as historical features, not as shelter, and do not rely on them for water or emergency protection. If you want more technical via ferrata than the route's protected passages, the dolomites via ferrata guide covers graded routes in the same ranges.
When to go
The walking season is summer, when the high passes are clear of snow and the huts are staffed. Early and late in the season, snow can linger on the high passes and on north-facing slopes, and afternoon storms are a regular feature of Dolomites summers. Build your days to start early, aim to be off exposed ground by mid-afternoon, and carry a shell even on clear mornings.
The northern plateau tends to be drier than the southern Dolomites, but that is a tendency rather than a guarantee. The southern gullies are the place to be most careful after rain, because wet grass on steep ground is the route's most common objective hazard. If you are walking in June or September, check snow conditions on the Marmolada and southern passes before you commit to the full route.
What to pack and how the descents add up
Pack for a hut-to-hut route with a mix of staffed huts and possible bivouacs: sleeping bag liner, hut shoes, cash for huts, a stove and food if you might use a bivouac, and a via ferrata kit for the protected sections. The descent totals are the hidden demand of this route, with several days losing well over 1,000 m (3,300 ft). Trekking poles and a lighter pack matter more here than on a route with gentler downhills.
Water is available at huts and from streams on many sections, but the southern stages are drier and more remote, so carry more than you think you need between refill points. A water filter or treatment tablets are worth the weight if you plan to drink from streams. Keep your daily food separate from your emergency food so you know what you have left.
Guided and self-guided options
Self-guided packages are the most common commercial format for the Alta Via 2. They typically cover hut reservations, a daily itinerary, GPS tracks and printed maps, leaving you to walk independently. The Dolomites-based operator offering the full route and the 6-day north half also includes a pre-hike video meeting and a digital navigation package.
A fully guided trip is the better fit if you are new to via ferrata terrain or want the route's exposure managed by a professional. Neither format removes the need for fitness or for your own weather decisions on the day. If you are comparing options, ask what happens if a hut is unavailable and whether the guiding company rebooks or refunds.
Plan Your Visit
Alta Via 2 is the Dolomites at their most demanding: long days, exposed southern gullies and a chain of huts that reward good planning. Decide first whether you want the full 13-stage traverse or the 6-day northern half, then book huts as early as you can and build in an exit at Passo San Pellegrino or Passo Cereda. If you are still choosing a Dolomites long-distance route, compare it with the Alta Via 1 Guide before you commit to the harder option.
Frequently Asked Questions
How difficult is the Alta Via 2 compared with the Alta Via 1?
The Alta Via 2 is the harder of the two. It has longer days, more exposed ground with fixed cables, and steeper southern gullies, and the mapped itinerary rates most stages hard. The Alta Via 1 is the better first hut-to-hut route if you are new to the Dolomites.
How many days does the Alta Via 2 take?
The mapped itinerary splits the route into 13 walking days, but commercial self-guided versions run it in 12 days or do the northern half in 6 days. Your own schedule should include at least one weather buffer day and a plan for the 20.2 km stage to Passo San Pellegrino.
Where does the Alta Via 2 start and finish?
It starts in Bressanone (Brixen) in South Tyrol and finishes in Feltre in the Veneto foothills. The first stage climbs to Rif Bressanone (Plosehuette), and the last stage descends from Rif Dal Piaz to Feltre over 18.7 km.
Can you hike just the northern half of the Alta Via 2?
Yes. A 6-day northern version keeps daily distance to about 13 km and daily ascent to about 1,100 m, using the plateau and Puez stages before exiting at a road pass. It suits hikers with a week who want the Dolomites hut experience without the southern gullies.
Do you need via ferrata gear on the Alta Via 2?
Yes, if you want to be properly equipped for the protected sections. A harness, helmet and via ferrata lanyard are the standard kit for the fixed cables and ladders, and you should be able to clip and unclip confidently on exposed ground. A guided trip is the safer option if you have not used this gear before.
When is the best time to hike the Alta Via 2?
Summer is the practical season, when the high passes are clear and the huts are staffed. Early and late in the season, snow can linger on high north-facing slopes, and afternoon thunderstorms are common, so start early and carry a shell.
Sources
Trail notes for your next trip
Optional updates when we add or revise hiking guides.
You might also like
Continue reading
More guides you'll find useful